 Verdant stock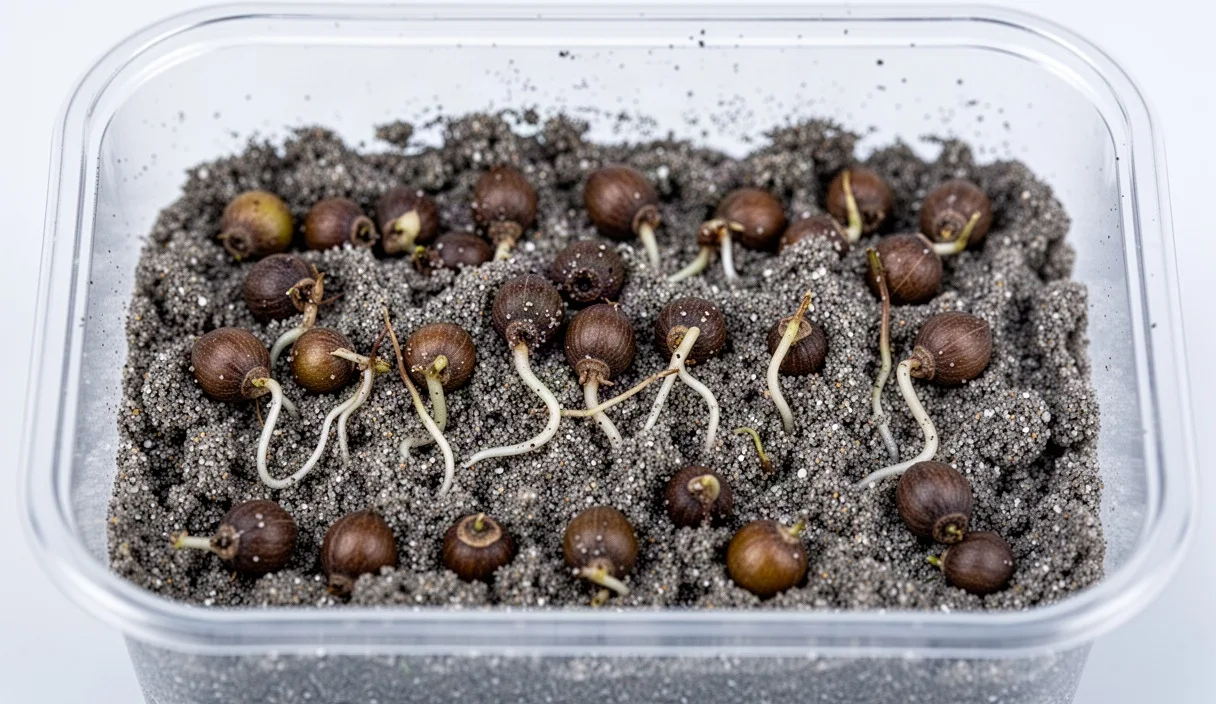

Wild pome species, including wild apple (Malus sylvestris), European wild pear (Pyrus pyraster), rowan (Sorbus aucuparia), and hawthorn (Crataegus monogyna), produce seeds characterized by deep physiological embryo dormancy. This evolutionary mechanism prevents premature autumn germination following fruit drop, ensuring that metabolic activity remains arrested until the seed experiences an extended period of moist, low-temperature conditions simulating natural winter soil environments. In nursery management, replicating this process systematically is termed cold moist stratification.
Propagators working with wild pome taxa face higher variability in dormancy length than those working with domesticated cultivars. Domestic orchard varieties have undergone selection for uniform, relatively rapid germination, whereas wild pome collections contain mixed genotypes with diverse chilling-hour requirements. Managing these lots requires exact control of thermal ranges, precise substrate moisture levels, routine inspection for developmental triggers, and non-phytotoxic sanitation practices. The following schedules and protocols standardize the handling of wild pome germplasm to secure dependable emergence across varied wild accessions.
Base Temperatures for Embryo Dormancy Break
The primary driver of dormancy release in the pome seed embryo is the steady accumulation of chilling hours within a narrow thermal range. Enzymatic degradation of abscisic acid (ABA), coupled with the synthesis of endogenous gibberellins, occurs almost exclusively when seed tissue hydration exceeds 40 percent and the ambient temperature remains between 1 degree Celsius and 5 degrees Celsius (34 degrees Fahrenheit to 41 degrees Fahrenheit). Temperatures below 0 degrees Celsius suspend the physiological cascade entirely, freezing the moisture within the stratification medium and arresting metabolic processes without contributing to the chilling requirement. Conversely, temperatures fluctuating above 7 degrees Celsius can induce secondary dormancy, a state that requires a secondary chilling cycle to break.
Different wild pome genera present varying chilling period requirements. Malus accessions from continental wild populations generally demand between 60 and 90 continuous chilling days. Pyrus accessions often resolve embryo dormancy slightly faster, typically within 50 to 75 days, though high-latitude populations remain recalcitrant past 80 days. Sorbus species display deeper dormancy, regularly demanding 90 to 120 days of uninterrupted chilling. Crataegus presents an exceptional case: its thick, lignified endocarp produces mechanical and chemical dormancy that often requires a 60-day warm stratification cycle (at 20 degrees Celsius to 25 degrees Celsius) prior to an extended cold cycle of 120 to 150 days.
| Botanical Taxon | Warm Phase Required | Target Thermal Range | Chilling Duration Range |
|---|---|---|---|
| Malus sylvestris | No | 1.5°C to 3.5°C | 60 to 90 days |
| Pyrus pyraster | No | 2.0°C to 4.0°C | 50 to 75 days |
| Sorbus aucuparia | Optional (14 days) | 1.0°C to 3.0°C | 90 to 120 days |
| Crataegus monogyna | Yes (60 to 90 days) | 1.0°C to 3.5°C | 120 to 150 days |
Stratification units must run on dedicated refrigeration units calibrated with secondary internal probes. Standard domestic refrigerators feature wide hysteresis bands, frequently swinging through 6-degree to 8-degree temperature spans during compressor cycles. For precise pome stratification, use digital temperature controllers with a differential setting of no more than 0.5 degrees Celsius to prevent unintended freezing or thermal stalling.
Substrate Ratios for Aerated Moisture Retention
Stratification media serve two mechanical functions: holding sufficient moisture to keep the seed coat and embryo hydrated, and maintaining air-filled porosity so that gas exchange proceeds without suffocating the metabolizing embryo. Pome seeds consume oxygen at a steady rate during cold stratification. If moisture displaces all pore space, anaerobic respiration leads to embryo mortality or the production of toxic levels of ethanol and lactic acid within the seed tissues.
The standard medium consists of an equal-volume mixture of milled sphagnum peat moss and horticultural-grade coarse perlite (grade 3 or coarse aggregate). Sand can be substituted for perlite, but it substantially increases the bulk density of the stratification container, which compresses bottom layers and restricts lower-tier aeration in containers deeper than 15 centimeters. An alternative substrate for small lots is clean, coarse vermiculite (grade 2), which provides exceptional water-holding capacity while resisting compaction when kept under low physical pressure.
To prepare the medium to the correct moisture level, follow this moisture adjustment procedure:
- Hydrate the dry peat moss using lukewarm demineralized water until it is fully soaked, then blend it thoroughly with dry coarse perlite at a 1:1 volume ratio.
- Take a handful of the mixed substrate and apply moderate hand pressure.
- Evaluate the run-off: water should barely bead between your fingers without forming a continuous dripping stream. If water runs freely, add dry perlite; if no moisture beads under firm squeezing, mist the medium lightly and re-mix.
- Blend the prepared seeds into the medium at a ratio of one part seed to three parts medium by volume. This spacing prevents localized pathogen spread between adjacent seeds during the multi-month chilling schedule.
- Pack the lot loosely into 4-mil to 6-mil polyethylene bags or rigid polypropylene containers fitted with gas-permeable lids. Do not compress the substrate during packing.
Monitoring for Precocious Radicle Emergence
Precocious germination occurs when seeds complete their chilling requirement and begin radicle extension while still inside the refrigeration unit. In wild pome lots, dormancy is rarely synchronized across every individual seed; a fraction of the lot may satisfy its requirements at day 45, while the remainder requires 80 days. Once the white radicle tip breaches the testaceous seed coat by more than 2 millimeters, the seedling shifts from dormant storage tissue to an actively growing plant that is highly vulnerable to mechanical breakage, dehydration, and fungal pathogens.
Monitoring intervals should follow a strict timeline based on total days under refrigeration. During the initial half of the expected schedule, inspect containers every 14 days solely to verify substrate moisture. Once the calendar reaches 60 percent of the target duration, increase inspections to every 5 days. For lots showing any radicle activity, check the medium every 48 to 72 hours.
When inspecting, empty the container carefully across a clean, sanitized sorting tray in an area shielded from direct heating and dry airflow. Scan for visible hypocotyl arching or radicle protrusion. If emergent seeds are identified, isolate them immediately using blunt featherweight forceps. Do not pull seeds by their emerged radicle; grasp the seed coat body securely. Once separated, move these sprouted individuals directly to seedling flats or cell trays filled with a standard growing mix, maintaining them under cool conditions (12 degrees Celsius to 15 degrees Celsius) to prevent transplant shock. Re-pack the remaining non-germinated seeds into the stratification medium, adjust moisture if the medium has dried, and return the container to cold storage.
Antifungal Sanitation Protocols Without Harsh Chemicals
Wild pome seeds carry diverse surface microflora, including fungal spores of Botrytis, Penicillium, and Fusarium. These fungi thrive in the dark, moist, high-humidity environment of the stratification container. Chemical fungicides such as captan or thiram were historically applied to stratified lots, but they can suppress embryo respiration, disrupt beneficial microbial competition, and present safety hazards in nursery production. Clean mechanical and mild oxidative approaches reliably control surface pathogenetic loads without impairing embryo vitality.
Initial sanitation begins immediately post-maceration. Seeds must be thoroughly freed of all sticky pulp, pectin, and carpel tissue, as residual sugars fuel early fungal outbreaks. Following pulp separation, perform a float test in clean water: discard floaters, which frequently possess aborted embryos or internal insect damage from chalcid wasps. The viable sinkers should then proceed through a standardized multi-step sanitation soak:
- Immerse the clean seeds in a 3 percent hydrogen peroxide solution for precisely 10 minutes at room temperature, agitating the solution continuously to detach surface air bubbles.
- Drain the peroxide solution across a fine stainless-steel mesh sieve and rinse the seed mass with running demineralized or distilled water for 3 minutes to remove oxidation residuals.
- Submerge the seed mass into an aqueous suspension of beneficial biological inoculants containing Trichoderma harzianum or Bacillus subtilis for 15 minutes. This creates a preventative biological shield on the seed coat before it contacts the stratification medium.
- Drain the seeds until no surface water films remain, then immediately blend them into the prepared, sterile stratification substrate.
If fungal hyphae appear within the container during the chilling cycle, pull the affected seed mass out immediately. Segregate visibly rotted, soft seeds and dispose of them. Wash the salvageable, firm seeds in a 1.5 percent hydrogen peroxide bath, incorporate them into a freshly mixed, clean batch of substrate, and sanitize the outer storage vessel using 70 percent isopropyl alcohol before returning the assembly to the cold chamber.
Transitioning Stratified Lots to Open Ground Beds
Moving seeds from steady 3-degree chilling conditions into fluctuating field beds demands careful timing to prevent thermal shock, desiccation, or surface soil crusting. In temperate production zones, align stratification schedules backward from the target spring sowing window. Field soil at a depth of 5 centimeters should consistently reach 7 degrees Celsius to 10 degrees Celsius before in-ground sowing commences. Sowing into frozen or waterlogged ground encourages rot, while sowing into warm, dry spring soils (above 18 degrees Celsius) can trigger secondary dormancy in freshly stratified pome seeds.
Prior to sowing, prepare open nursery beds to a fine, loose tilth. Heavy clay soils should be amended with composted bark or coarse grit to prevent surface capping after rain. Incorporate a light, balanced mineral fertilizer if soil tests indicate deficiencies, but avoid high-nitrogen inputs, which can burn delicate emergent roots. Open parallel furrows at a depth equal to two to three times the narrowest dimension of the seed, which corresponds to roughly 8 millimeters to 12 millimeters for wild pome accessions.
Extract seeds gently from the substrate by passing the stratification mix over an 8-mesh hardware screen. Spread the seeds evenly along the furrow base at a density of approximately 40 to 60 seeds per linear meter, depending on the target seedling caliper and intended duration in the seedbed. Cover the furrow with an equal mixture of sand and sieved topsoil to prevent crust formation. Immediately apply a layer of clean, weed-free straw or double-shredded hardwood mulch 2 centimeters to 3 centimeters thick over the beds to conserve moisture and buffer against sudden soil temperature surges. Maintain soil moisture through fine-droplet overhead irrigation until the first true leaves emerge and harden.
Common Mistakes
- Stratifying wet seeds without draining free moisture: Seeds submerged in pooling free water inside plastic bags rapidly succumb to anoxia, leading to sour, fermentative odors and blackened, dead embryos.
- Relying on unmonitored home refrigeration units: Cycles that drop below minus 1 degree Celsius can kill partially hydrated, non-hardened seed tissues, while cycles exceeding 7 degrees Celsius delay or reverse dormancy break.
- Overlooking endocarp barriers in stone-bearing pomes: Subjecting Crataegus directly to cold stratification without an initial warm breakdown phase yields extremely low or delayed emergence over multiple seasons.
- Delaying sowing once radicle elongation begins: Allowing the radicle to grow past 5 millimeters within the substrate makes damage-free separation during sowing nearly impossible.
- Deep outdoor planting: Sowing stratified pome seeds deeper than 15 millimeters exhausts the energy reserves of the cotyledons before they breach the surface, especially in heavy soils prone to crusting.
Practical Next Steps
To begin a stratification schedule for wild pome lots, first verify the origin, species identity, and harvest date of your seed material. Calculate your regional average date for the final hard spring frost, and back-calculate the required stratification period using the specific day counts detailed in the temperature schedule table. Procure your coarse perlite, milled sphagnum peat, and sanitation reagents well in advance of the start date.
Test all refrigeration controls using a minimum-maximum recording thermometer or a digital data logger over a continuous 48-hour calibration window before placing any seed lots into the unit. If you are handling large commercial quantities, consult an accredited seed testing laboratory to run tetrazolium viability tests on a representative sample of each wild lot; this establishes baseline viability so that germination rates can be accurately interpreted at emergence.