 Verdant stock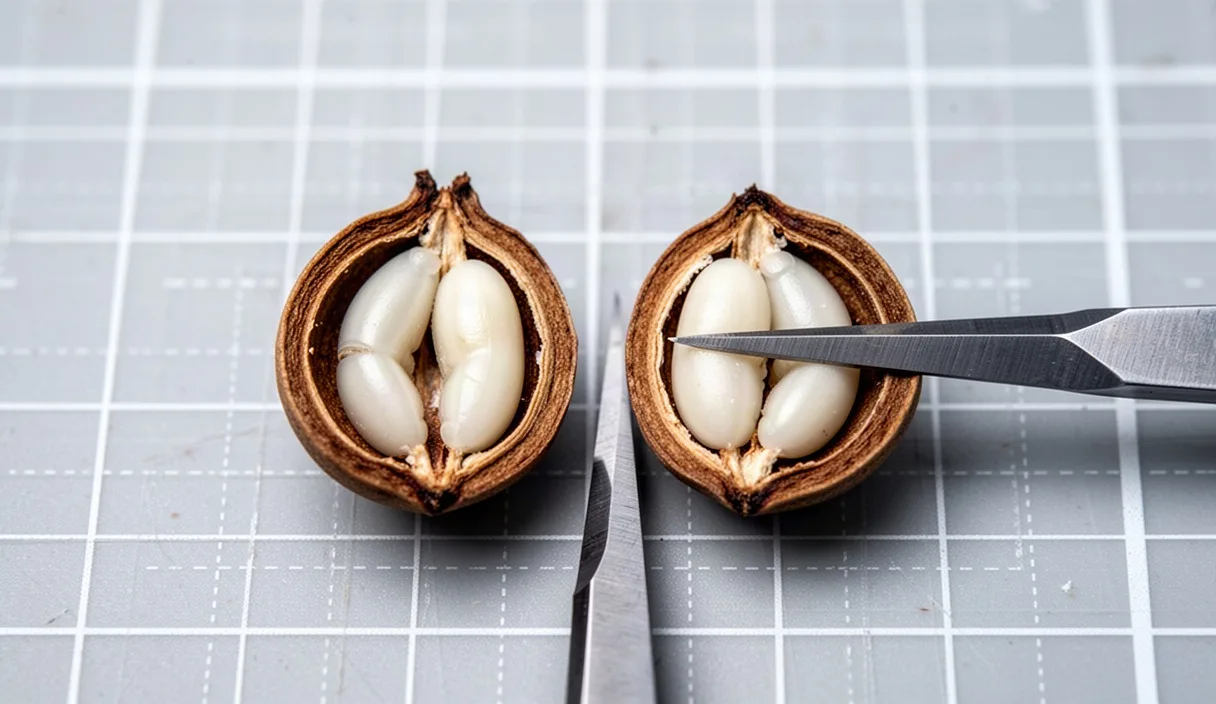

Seed viability testing assesses the proportion of seeds within a given lot that possess the physiological capacity to germinate under suitable environmental conditions. For nursery operators, foresters, and seed collectors, establishing an accurate viability percentage prior to stratification and sowing is critical. Relying on gross seed weight or total volume without assessing internal seed quality routinely leads to miscalculated sowing densities, wasted seedbed space, and uneven seedling emergence. Two mechanical evaluation methods, cold water floatation and physical cut testing, offer direct, field-ready insights into seed lot quality without requiring weeks of incubation.
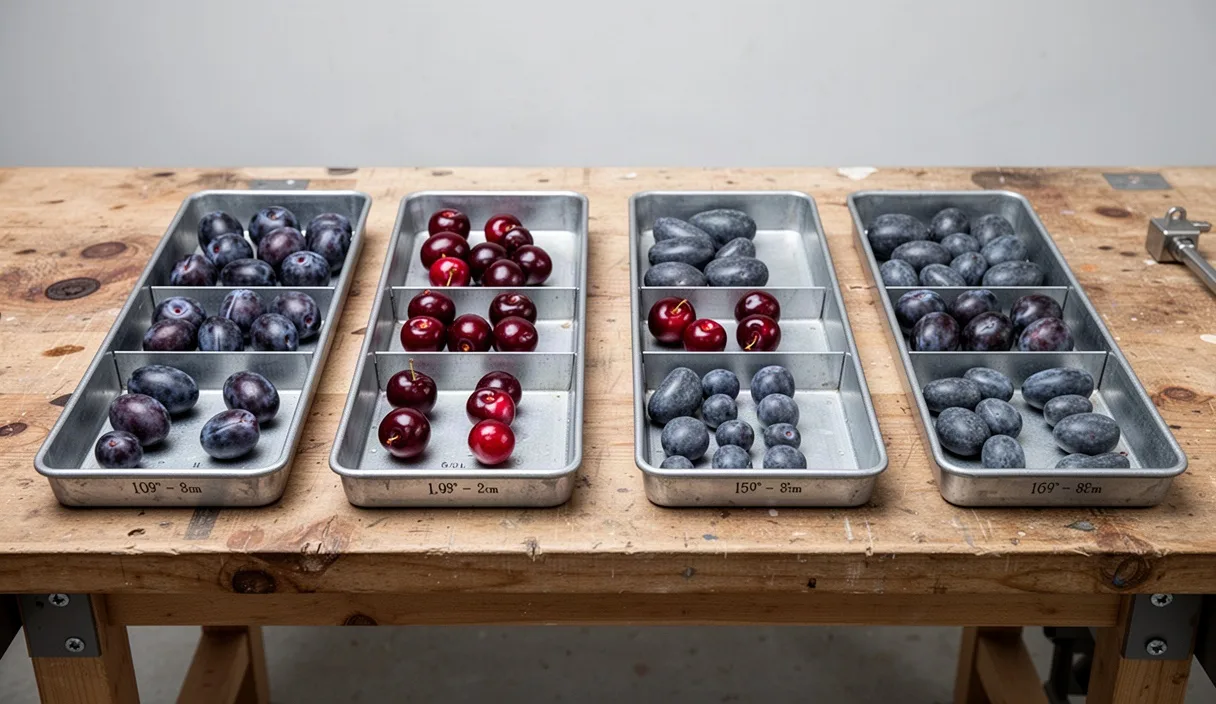
Floatation separates empty, desiccated, or severely insect-damaged seeds from full, sound seeds based on differences in specific gravity. Cut testing directly exposes internal anatomy, enabling physical inspection of the embryo, cotyledons, and endosperm or megagametophyte. These testing protocols are primarily utilized for large-seeded woody species, including members of the genera Quercus (oaks), Juglans (walnuts), Carya (hickories), Castanea (chestnuts), and selected conifer and stone-fruit taxa. Floatation and cutting do not assess physiological dormancy status, but they reliably isolate structurally sound seeds from hollow, rotted, or aborted specimens.
Representative Sample Selection from Large Seed Lots
An accurate assessment depends entirely on acquiring a representative working sample from the parent lot. Testing high quality seeds skimmed exclusively from the top of a bulk container creates positive bias, while sampling only the floor sweepings creates negative bias. Standard seed testing procedures require drawing primary samples from random locations and depths throughout the container to form a unified composite sample.
For seed stored in bulk bags, barrels, or bins, draw primary samples using a seed trier (grain probe) or by taking grab samples by hand at five distinct levels: top, upper-middle, center, lower-middle, and bottom. If the lot consists of multiple bags, sample according to lot size. For lots consisting of one to four containers, sample each container; for lots of five to eight containers, sample at least four; for lots exceeding eight containers, sample at least five containers plus ten percent of the remaining containers. Combine these primary extractions in a clean bucket to form the composite sample.
Reduce the composite sample down to the working sample using either a mechanical divider, such as a Boerner divider, or the manual halving method. To execute manual halving, thoroughly mix the composite sample, pour it onto a flat, clean surface to form a cone, flatten the cone evenly into a circular disk, and divide it into four equal quadrants across two perpendicular axes. Discard two opposing quadrants, recombine the remaining two, and repeat the process until the desired working sample size is reached. For statistical reliability, the working sample for cut testing should contain at least 400 seeds, evaluated in four distinct replicates of 100 seeds each. If seed stock is severely limited, a minimum evaluation sample of 200 seeds (two replicates of 100) can provide an acceptable preliminary benchmark.
Executing the Cold Water Floatation Separation
Floatation separation operates on the principle that healthy, fully developed seeds have a specific gravity greater than 1.0, causing them to sink in freshwater. Conversely, seeds with internal air pockets caused by incomplete embryo development, insect consumption, or post-harvest desiccation possess a specific gravity less than 1.0 and float to the surface. This procedure must be applied cautiously to orthodox seeds, which undergo substantial dehydration during natural maturation, because over-dried sound seeds may float temporarily until their outer coats rehydrate.
For recalcitrant seeds like acorns (Quercus), which maintain high moisture contents throughout storage, floatation is executed immediately after harvest. For orthodox or dormant seeds with dry shells, such as certain conifers or dried stone fruits, soak the seeds in cold tap water for an initial period to balance external moisture before recording float percentages.
Execute the floatation procedure through the following sequence:
- Vessel Preparation: Fill a deep, wide-mouthed container with clean, cold tap water maintained between 15 and 20 degrees Celsius. Ensure the water depth is at least three times the vertical height of the seed volume being tested to permit unrestricted settling.
- Seed Introduction: Slowly submerge the seed sample into the water. Agitate the surface thoroughly by hand or with a flat paddle for 45 to 60 seconds to dislodge air bubbles adhering to seed coats, pericarps, or residual cupules.
- Settling Period: Allow the bath to remain undisturbed for the duration indicated for the species. Acorns generally separate within 15 to 30 minutes; species with thick, porous shells, such as black walnut, may require up to 4 hours. Do not exceed 24 hours of soaking, as oxygen starvation can trigger seed death.
- Skimming Floaters: Remove all seeds floating on the water surface using a perforated skimmer. Place them onto an isolated tray labeled as non-dense. Record the total number of floaters.
- Harvesting Sinkers: Drain the liquid or scoop the seeds resting on the bottom of the container. Spread them in a single layer over drying screens. Record the total number of sinkers.
| Species | Water Immersion Window | Primary Cause of Floating | Sinkers Usability Rate |
|---|---|---|---|
| Quercus rubra (Northern Red Oak) | 30 to 45 minutes | Weevil damage (Curculio), desiccation | 84% to 94% viable |
| Quercus alba (White Oak) | 15 to 30 minutes | Embryo abortion, deep drying cracks | 88% to 96% viable |
| Juglans nigra (Black Walnut) | 2 to 4 hours | Shriveled kernel, pericarp decay | 76% to 89% viable |
| Pinus strobus (Eastern White Pine) | 10 to 15 minutes | Empty seed coats, resin pockets | 82% to 91% viable |
Floatation separation is an exclusionary process, not a confirmation of viability. While floating seeds are predominantly dead or severely compromised, sinkers are simply full. A fully formed seed that has died from pathogen infection, freezing injury, or age will still sink if its internal tissues remain dense and waterlogged. Therefore, sinkers must be evaluated using physical dissection.
Dissection Methods for Hard-Coated Tree Seeds
The cut test physically opens the protective layers of the seed, allowing direct visual evaluation of internal structures. Because many tree seeds possess thick, bony endocarps or tough woody pericarps, proper stabilization tools and cutting implements are necessary to avoid damaging the internal embryo or injuring the technician.
Select tools according to the hardness of the seed coat. Thin-coated species (e.g., Acer, Fraxinus, Pinus) require a standard scalpel equipped with a No. 11 or No. 22 carbon-steel blade. Medium-coated species (e.g., Quercus, Fagus) are sliced cleanly using single-edge razor blades or bypass pruning shears with precision ground blades. Bony, lignified species (e.g., Prunus, Juglans, Carya) require a bench-mounted miniature vise, anvil-style hand pruners, or specialized nutcrackers to crack the outer shell without crushing the soft kernel inside.
Prepare hard, dry seeds by soaking the working sample in cold water for 12 to 24 hours prior to dissection. This rehydration softens fibrous tissues and prevents the internal structures from shattering into illegible fragments when cleaved.
Make the primary incision along the longitudinal axis, slicing from the apex (top) through the base (micropylar region) where the embryonic axis resides. In dicotyledonous seeds like oak or maple, orienting the cut parallel to the cotyledon interface reveals the hypocotyl-radicle axis cleanly. For conifer seeds, slice lengthwise down the center to divide the seed into two symmetrical halves, exposing the linear embryo embedded inside the surrounding megagametophyte tissue. Transverse (cross-sectional) cuts can be used to assess cotyledon tissue volume quickly, but cross-sectional cuts frequently miss localized necrosis situated directly at the tip of the embryonic radicle.
Visual Criteria for Healthy Versus Necrotic Endosperm
Once opened, inspect the internal structures using a 10x hand lens or a stereomicroscope under direct, cool-white illumination. Viability classification relies on tissue color, firmness, hydration status, and embryonic completeness. Seeds are classified into distinct categories: viable (sound), non-viable (aborted, rotted, or desiccated), and mechanically or insect-damaged.
Healthy, viable internal tissue exhibits a firm, solid texture. The endosperm or cotyledonary tissue should display an ivory, creamy white, or pale greenish-white hue, depending on the species. When probed lightly with the tip of a dissecting needle, viable tissue yields slightly without collapsing, exuding no foul odor, watery slime, or dark exudate. The embryo itself must be structurally complete, fully occupying its assigned cavity, with an intact, unstained radicle tip.
| Morphological Feature | Sound / Viable Condition | Unviable / Necrotic Condition |
|---|---|---|
| Tissue Color | Uniform porcelain white, ivory, or pale cream | Dull yellow, brown, slate gray, or black |
| Tissue Texture | Firm, fleshy, resilient, crisp when sliced | Spongy, watery, rubbery, chalky, or brittle |
| Cavity Occupancy | Tissue occupies 92% to 100% of seed coat | Shriveled, collapsed, occupying under 75% |
| Embryonic Axis | Distinct, turgid, white, structurally whole | Soft, brown, missing, or mechanically severed |
| Pathogen Presence | Clean, zero visible surface contamination | Fungal hyphae, black spore masses, bacterial ooze |
Non-viable seeds exhibit several visual degradation patterns. Water-soaked or glassy tissue indicates membrane breakdown and internal cellular death, frequently caused by sub-freezing exposure while moisture levels were excessively high. Brown or black discoloration localized around the embryonic axis marks severe necrosis, rendering the seed non-viable even if the surrounding cotyledon tissue remains white and firm. Hollow chambers containing dry, powdery frass or white, segmented larvae denote internal destruction by weevils (such as Curculio or Conotrachelus species) or seed-chalcid wasps. Any seed showing visible fungal mycelium within the internal cavity must be recorded as non-viable, as these pathogens rapidly consume remaining reserves during nursery stratification.
Formulating Bed Seeding Rates from Viability Percentages
The raw viability percentage calculated from floatation and cut testing serves as the foundation for determining precise field or container sowing densities. Sowing raw counts without adjusting for non-viable units leads directly to sparse seedling stands or overcrowded, disease-prone nursery beds.
To establish the baseline viability percentage (V), divide the number of sound, healthy seeds by the total number of seeds dissected in the working sample, then multiply by 100:
V = (Sound Seeds / Total Dissected Seeds) * 100
For example, if a cut test performed on 400 northern red oak acorns reveals 312 sound individuals, 48 insect-damaged individuals, and 40 rotted individuals, the viability calculation is:
V = (312 / 400) * 100 = 78%
Field emergence rarely equals laboratory or cut-test viability due to seedbed soil resistance, pre-emergence damping-off, and minor climatic fluctuations. Therefore, calculate a Field Emergence Factor (FEF), derived from historical nursery records for that species under local site conditions. FEF typically ranges from 0.70 to 0.85. Incorporate Seed Purity (P), expressed as a decimal, which reflects the proportion of clean, whole seed versus inert debris, broken coats, and twigs in the lot.
Use the following unified formula to determine the required linear bed seeding rate (Seeds per Linear Meter):
Seeds per Linear Meter = Target Seedlings per Linear Meter / ((V / 100) * FEF * P)
Consider an operational example where a nursery manager requires an established seedling density of 42 seedlings per linear meter of bed. The seed lot possesses a cut-test viability of 78% (0.78), an expected nursery field emergence factor of 0.82, and a purity rating of 96% (0.96). The calculation proceeds as follows:
Effective Germination Capacity = 0.78 * 0.82 * 0.96 = 0.614
Seeds per Linear Meter = 42 / 0.614 = 68.4 seeds per meter
The manager must calibrate the seed drill or hand-sowing crew to distribute 69 seeds per linear meter to successfully achieve the target density of 42 established seedlings. If the manager had sown based on seed count alone without accounting for viability, purity, and field loss, the bed would have produced only 25 to 26 seedlings per linear meter, leaving the production target 38% under-stocked.
Common Mistakes
- Floating Desiccated Orthodox Seeds Immediately: Placing dry conifer or hard-coated legume seeds directly into water without recognizing that natural dehydration causes them to float, even when the internal embryo is fully viable.
- Assuming Sinkers Are Universally Viable: Assuming all seeds that sink are capable of germination without performing a subsequent cut test on a representative subsample to detect internal fungal rot or freeze mortality.
- Cutting Exclusively on the Transverse Plane: Slicing seeds across their midsection, which exposes the cotyledons but routinely misses dead, darkened, or aborted radicles located at the base.
- Overlooking Concealed Weevil Frass: Failing to probe tiny, dark surface pinholes on acorns and hickory nuts, which often conceal extensive internal larval feeding galleries filled with compacted frass.
- Extending Float Times Indefinitely: Leaving seeds submerged in standing water for several days to encourage stubborn sinkers, which suffocates embryonic cells and induces seed mortality.
Practical Next Steps
Once viability testing is complete, record the metrics alongside the species name, collection origin, date, and seed lot number in the nursery inventory ledger. Immediately dry the sound sinker fraction down to its targeted storage moisture content if long-term refrigeration is planned, or transfer the seeds directly into cold, moist stratification if sowing is scheduled for the upcoming season.
Thoroughly sanitize dissecting knives, pruners, and cutting boards using a 70% isopropyl alcohol solution or a 10% sodium hypochlorite bath between distinct seed lots to prevent transferring fungal pathogens like Fusarium or Phomopsis across samples. When working with commercially critical or legally regulated seed lots where physiological dormancy or non-dormant tissue metabolic activity remains in question, consult an accredited seed testing laboratory to perform a quantitative biochemical Tetrazolium (TZ) test or an excised embryo test.